Pages

Friday, January 27, 2012

How to Paint a Room


I have spent my recent free time sporadically picking up Susan Waggoner's practical and delightfully helpful book, Simple Country Wisdom. Her logical take on the simplification of a home ranges from no-scrub tricks to make bathroom faucet gleam, to advice on keeping your home harmonious, all with the mindset of completing the task with as little fuss as possible. Susan strives to help her readers create a cheery, welcoming, warm home that caters to the needs of those who live within its walls. It is a book certainly worth purchasing.

Today I am sharing a section from her book on how to paint a room. This is a wonderful source to keep for future reference. It includes common sense tips to, hopefully, help the walls you plan to paint look a little less intimidating. I hope you find her tips as helpful as I have.
A refreshed room beings at the paint store. If it's been a while since you've painted, be sure to check out the latests gadgets. As I discovered last time I painted, edgers, extenders, pint-sized rollers, and a lot of other gear now make it possible to do perfect walls and ceilings in places that won't accommodate a ladder.

Once you're home with your paint, it's time to take everything off the walls and take everything that is moveable - including furniture - out of the room. It seems like a lot of work, but it will more than pay you back when it is time to paint.

Push all the remaining furniture to the center of the room and cover with the plastic sheets you bought at the paint store.

Cover the floor as much as possible with drop cloths. You may not be painting on the other side of the room yet but trust me, someone with paint on their shoe will be sure to walk where there isn't a cloth. I prefer to use old sheets as my drop cloths rather than the plastic drop cloths sold at the store, because the plastic slides around.

Examine the walls for cracks and divots that need spackling. If you're filling in a divot, remember that spackle shrinks as it dries, so you may need to do a second application. Be sure to let the spackle dry at least as long as the can says - longer, if possible, to make sure there is no further shrinkage or cracking.

Wash the walls with soapy water, even though you're about to paint over them. While you're at it, dust or wash the baseboards as well. Paint doesn't adhere well if the walls are dirty, and painter's tape doesn't cling to dirty woodwork. A quick version is to dust the walls lightly and thoroughly clean the baseboards.

Remove electrical outlet plates and register covers, and cover the switches and outlets with tape to guard against drips. Tape each set of screws to the plate to which they belong.

Protect the baseboards by running a strip of painter's tape along the upper edge. Press it down as you go and, instead of pressing it down to cover the baseboard, let it stick out horizontally - it will work like a tray to catch drips. Tape around the windows and door frames as well.

Work from the top down. Splatters happen, so this way you won't be splattering a wall you just painted. Start with the ceiling and crown molding. If you are painting the crown molding a different shade from the ceiling, you will need to avoid marring the freshly painted area. If you have a steady hand and a lot of confidence, use a small brush to carefully paint the edge of the molding that abuts the ceiling. Small spots and smears can be touched up later. If this idea makes you weak at the knees, there are a couple of alternatives. One is to hold a straight-edged metal trowel against the ceiling as you paint. You can also use painter's tape, but that means waiting for the ceiling to be thoroughly dry. I've learned that "dry" and "thoroughly dry" are two different things. The ceiling may feel dry to the touch, but using tape too soon may cause damage if it isn't completely set. How long this takes depends on the humidity in your home, and how thick or thin the coat of paint was.

Now you're ready for the walls. Again, start at the top. Use a brush or an edging pad to paint a clean straight edge where the wall joins the ceiling or molding. Use a brush to paint the upper few inches of the wall, the corner seams, and about six inches around the windows and doors.

After you have taken care of the areas that must be done by hand, switch to your roller. Thanks to all your prep work, you'll be amazed to see how little time it takes to cover the wall.

Step back every so often to see if there are places you missed. Remember that paint changes color as it dries, so the piece of wall you just did won't look like the patch you started with. I've found it easier to let the whole area dry, then apply a second coat if needed.

If you've finished your paint job in one day, throw the rollers away. If you plan to paint tomorrow or the next day, wash your rollers and brushes in warm water (assuming you're using latex paint), squeeze them out, and let them dry.

My personal advice when it comes to rollers is to buy a roller cover for every day you plan to paint. It takes gallons of water to get the paint out of the roller, and mine seldom dry completely before I am ready to paint the next day. This is a problem because a roller that feels just a little damp has a considerable amount of moisture in it, and the moisture dilutes your paint and makes for a bad paint job. So starting with a new roller cover every session is much easier, saves a lot of water, and results in a far better paint job.

When the room is thoroughly dry, replace the switch plates and register covers and enjoy putting your new room back together.


I used to save all of my leftover paint, just in case. Eventually, I realized two things. First, if I ever needed to do more than a touch-up, I'd have to buy new paint and redo the whole room anyway, because the old paint would have faded and the large touch-ups wouldn't match. I also realized that paint left in a can with a lid that no longer seals dries out. Now I pour enough for minor touch-ups in a small mayonnaise jar and dispose of the rest.

Use a drop of paint on a cotton swab to touch up a scratch or other type of blemishes on a painted wall. You won't waste a bunch of paint and you won't have to waste time cleaning a paint brush.

Keep a damp cloth with you when you're painting. Wipe up any splatters right away, and wipe your hands often to avoid accidentally leaving a trail of fingerprints where you don't want them.

Monday, November 28, 2011

Since last we spoke

Hi, I've been distracted. When there are things like family and thanksgiving feasts and friends and trips to the cabin in the mix, sitting down in front of the computer is is the first thing to go. Here's what I've been doing since last we were together.


1. During a weekend stay at my family's cabin we took a little day trip. Parking our car in front of the No Trespassing sign, we walked around the frozen lake.   2. It was freezing cold at said lake. Cold enough that my brother allowed my sister to stand that close to him.   3. With snow soaking through our city-slicker shoes, we still stopped to take a picture.   4. A small cabin nearby the lake   5. This is my kind of holiday. We started Christmas a week and a half before Thanksgiving. One can't help it when snow is falling outside.

1. After a family outing we came home to a delicious meal prepared by mama.   2-3. Christmas tree decorating at home and the cabin. (Note: last year we started using the larger, round bulb lights on our tree. The effects are quirky and magical)   4. The joys of the holidays.

I love the holiday season. I love the kindness shared by everyone, the looking inward to see where improvements can be made, and the looking outwards to see where your time and service is needed. Along with this season comes an expectation of time spent with family, the joy of cooler weather contrasted by the bright lights, the many smells reminiscent of years past, and oh, the blessed Christmas music. It's a time when the world seems closer together, when greetings are shared, thanks are given, and smiles are visible on everyone's face. I always appreciate my life more around this time. 

What are some of your favorite parts of this time of year?

Thursday, November 3, 2011

Soho House New York


Located in New York is Soho House, a private member's club and hotel in Manhattan's Meatpacking District. The Soho House was "born out of a reaction to the pomposity of the traditional private members club." In an area where private clubs are generally made of a similar crowd - a place for corporate men and women to gather together in their suits to drink some brandy, this private social club has a strict requirement allowing only those working in a creative, unconventional field to qualify for a membership.


I was in a club once. Meetings were held beneath the tree in my grandparent's front yard. We gathered once or twice to discuss in hushed voices what game we should play next. 


I was in another club too, one that met in the closet beneath the stairs in my old house. That club never got further than calling itself a club. 


Soho House has a history far greater than either of my wimpy clubs.


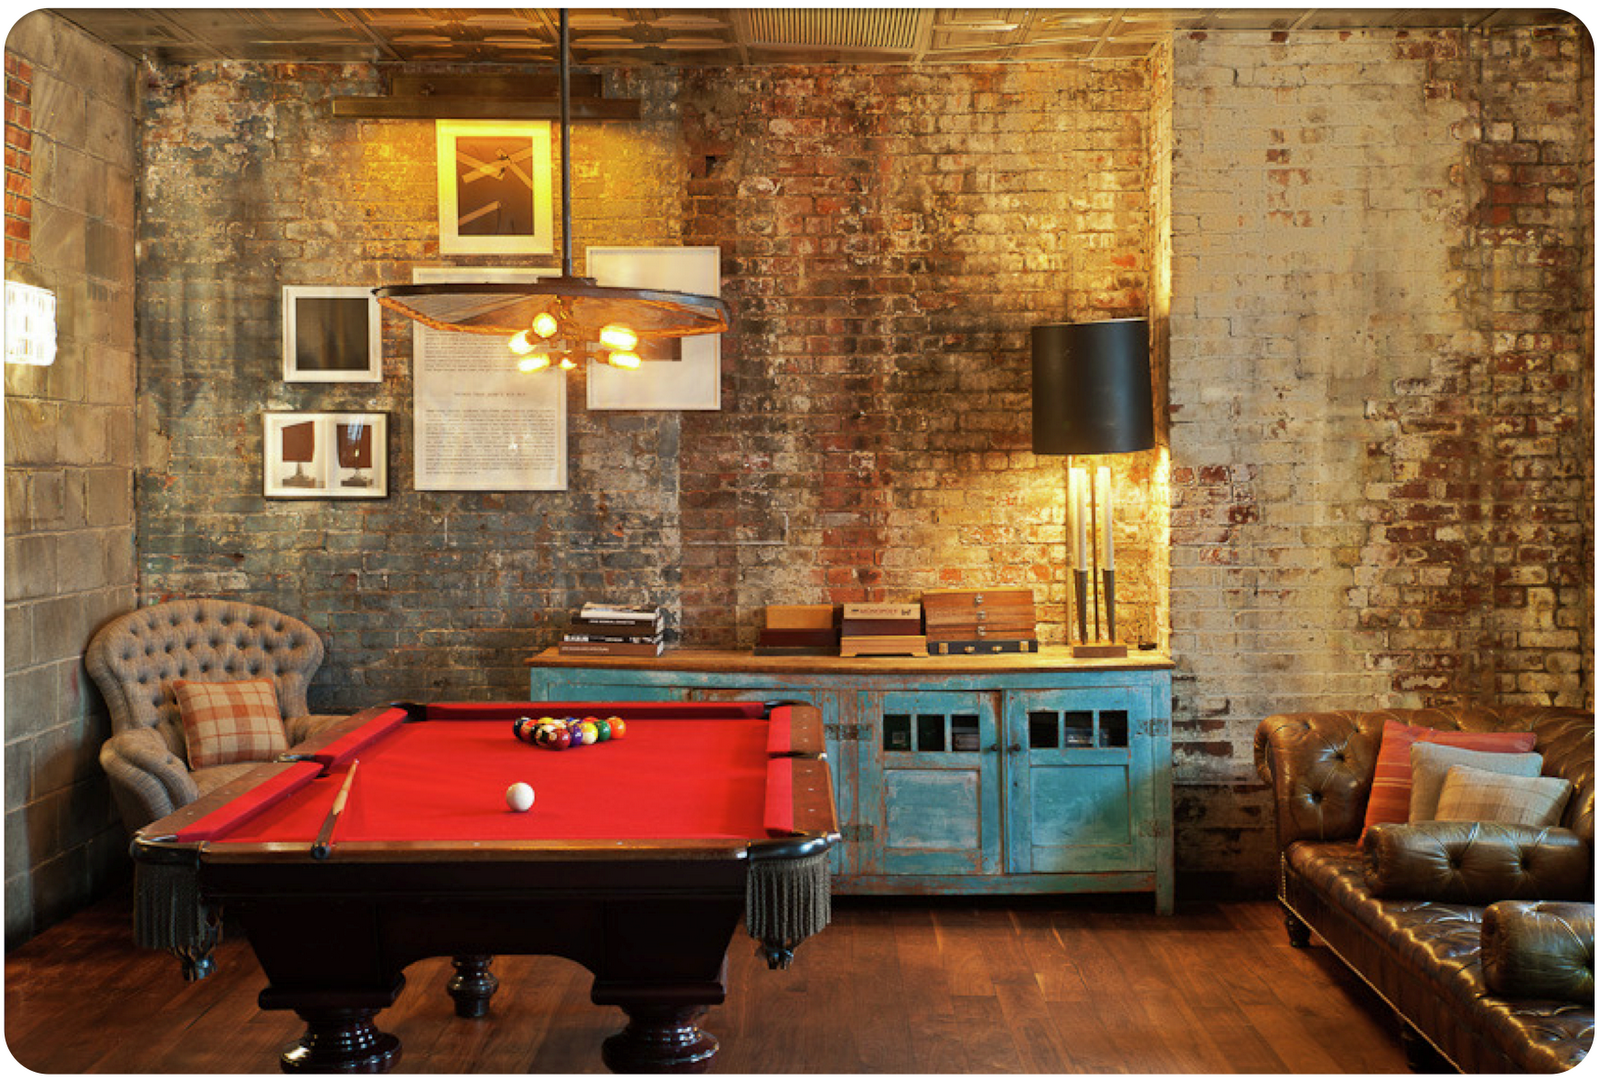
While the Soho House is certainly not in want of money, the designers did an excellent job at keeping the space from feeling like a ritzy museum. Their intention of a comfortable and cozy feel is evident in every room of this renovated factory. They maintained the original brick and aged wood as part of the space and chose inordinate amounts of tufted sofas and arm chairs, detail-ridden ceilings, ridiculously cool light fixtures, and a mix-and-match style to highlight the existing features. 


I'm pretty sure this place is home to every chair crush I have ever had.


Wednesday, November 2, 2011

Kohler: Tresham Challenge Part III

This is the final bathroom put together by the Kohler team to show off the versatility of the Tresham Collection. I'm most fond of the subltly printed wallpaper, the playful shapes throughout the space, aaaand her outfit.


Between Option one, Option two, and this, Option three, which bathroom do you like most?

Friday, October 28, 2011

Introducing: Swarm

Look at these cool chairs I saw here (a neat house tour, by the way, with the best shade of grey I've seen in a while). 


Made by Leslie Oschmann at Swarm in Amsterdam. Leslie finds objects in Dutch markets, French homes, or Belgian antique shops, then refinishes them. Her focus is in the juxtaposition of materials - silk on oil canvas, linen on wood, or stitching on canvas, then turning the old piece into something unexpected and beautiful.


Leslie is cool.


Wednesday, October 26, 2011

Kohler: Tresham Challenge Part II

Are you ready to see the greatest residential bathroom ever designed?

It is stunning. Nearly perfect, even. I may have even fallen off my chair when I saw it, though those two events may have been unrelated. I often fall for no reason at all. Just gravity.

As I mentioned earlier, Kohler had a few of their employees engage in a friendly competition to design a bathroom of their taste using the new Tresham collection. I showed a preppy, delightful lounge designed by Kohler art director, Katie Begalke, and today I'm showing the bathroom designed by a team at Kohler. It's charming and delightful. Just...take a gander.


I know, I told you.

Though a space of this size and architectural detail is disappointingly hard to come by, the charming elements can certainly be applied in your own home. Everyone can have a space they enjoy as much as I like this and still pay rent, I promise. It just takes a little extra thought. Pedestal sinks are a classic choice for a restroom, Shaker-style furniture and mismatched frames create an old-time feel, timeless moldings beside the elegant wallpaper add sassy visual interest, and the placement of the chandelier...ohh the placement of the chandelier. Muah! There are a few things in this room that I'm ready to incorporate in my home when the time comes.

What elements (besides the model's outfit) would you like to mimic?

Tuesday, October 25, 2011

October 25th

Happy birthday to my mama.

My mother is the reason I am in interior design - why I love creating, designing, and coming up with less-expensive options for a beautiful result. She has always been interested in these things herself, so when I came along in my overalls and slicked-back-ponytail glory (blessed, blessed 90's) and had an inborn interest in design, she took me under her wing and showed me the way. I'm so happy to have someone with whom I can get excited over grimy old furniture and scraps of fabric. We are pretty good friends.

Mama, your birthday present is wrapped and ready to be opened.


Friday, October 21, 2011

Kohler: Tresham Challenge Part I

On paper, working for a company that manufactures toilets doesn't sound too magnificent. However, when one has the perk of creating a look for a company like Kohler using latest product like the Tresham Collection, the cons kind of get flushed out.

First up, Katie Begalke, an art director for the Kohler company. Using some things from her own home (the pictures, Nancy Drew books, white rug, and Antoinette Fainting Sofa) Katie created a preppy, traditional space. Once her own pieces were in place, she added the wainscot, baseboards, and the Tresham collection. It's a traditional idea with a quirky twist that was used for a non-traditional purpose.


My favorite elements:
The Pinstripe Faucet in Vibrant French Gold
Various colors on the walls, adding even greater dimension
How easily this look can be achieved with a small budget

Next up: Kohler Company's take on the Tresham Collection challenge. You're going to cry.

And your favorite elements?